

A Creamy, Fluffy, and Irresistible Japanese Egg Sandwich Experience
The beloved Japanese Egg Sandwich has become a global sensation because it delivers comfort, simplicity, and unmatched creaminess in every bite. As you take your first look at its velvety filling tucked between slices of soft milk bread, you immediately understand why it is one of the most popular items in Japanese convenience stores. Because the combination of rich yolks, smooth Japanese mayonnaise, and pillowy shokupan is so satisfying, this sandwich has earned a permanent place in lunchboxes, cafes, and bento shops across Japan. Since it is famously known as tamago sando, many travelers remember it as the soft, crustless sandwich they bought at a Konbini during busy mornings or long train rides.
Since this recipe focuses on recreating an authentic texture, you will see how the right eggs, proper boiling technique, and the signature Kewpie-style mayo all come together. In addition, we will walk through each step with helpful transitions, because making a great Japanese Egg Sandwich is all about understanding its simple foundations. Finally, this guide includes tips for storing, customizing, and pairing your sandwich so that lunch becomes easier and more enjoyable.
Jump To :
- Understanding the Magic Behind a Japanese Egg Sandwich
- Ingredients Overview for the Perfect Japanese Egg Sandwich
- How to Make a Japanese Egg Sandwich Step-by-Step
- Helpful Tips and Techniques for the Best Tamago Sando
- How to Store a Japanese Egg Sandwich Properly
- Additional Lunch Inspiration to Pair with Your Japanese Egg Sandwich
- FAQs About Japanese Egg Sandwiches
- Conclusion
Understanding the Magic Behind a Japanese Egg Sandwich
Making a Japanese Egg Sandwich starts with appreciating the three elements that define it: high-quality eggs, silky mayo, and exceptionally soft bread. Because every component plays a key role, let’s explore them one by one.
Why High-Quality Eggs Matter in a Japanese Egg Sandwich
Eggs are the foundation of tamago sando, and choosing the right ones makes a noticeable difference. Since the yolk flavor intensifies when mixed with mayo, fresh eggs create a creamier and more vibrant filling. In addition, whether you prefer soft boiled eggs or hard boiled eggs, the technique affects texture. Many people enjoy a jammy center because it gives the filling a naturally custard-like consistency.
The Importance of Japanese Mayonnaise for Authentic Flavor
Because Japanese mayonnaise uses egg yolks instead of whole eggs, it offers a richer flavor compared to Western mayo. It also has a balanced sweetness that complements the eggs beautifully. When you whisk it into the chopped eggs, it creates a smooth filling that defines the entire sandwich. If you have ever tried Kewpie mayo, you already know how essential it is for this recipe.
Soft Milk Bread: The Heart of Every Japanese Egg Sandwich
Japanese milk bread, known as shokupan, gives the sandwich its signature cloud-like texture. Since this bread is baked with milk and butter, it is softer and fluffier than standard sandwich bread. In addition, its subtle sweetness balances the creamy filling. Because shokupan slices stay tender even after being chilled, they are ideal for bentos, travel lunches, or meal prep.
Ingredients Overview for the Perfect Japanese Egg Sandwich
Here is a simple overview of what you will need to make this delicious lunch. Each ingredient contributes something essential, and because this recipe is so simple, every detail truly matters.
- Eggs (soft boiled or hard boiled)
- Japanese mayonnaise
- Soft milk bread (shokupan)
- Salt and pepper
- Optional sugar for extra sweetness
- Butter (light spread for bread)
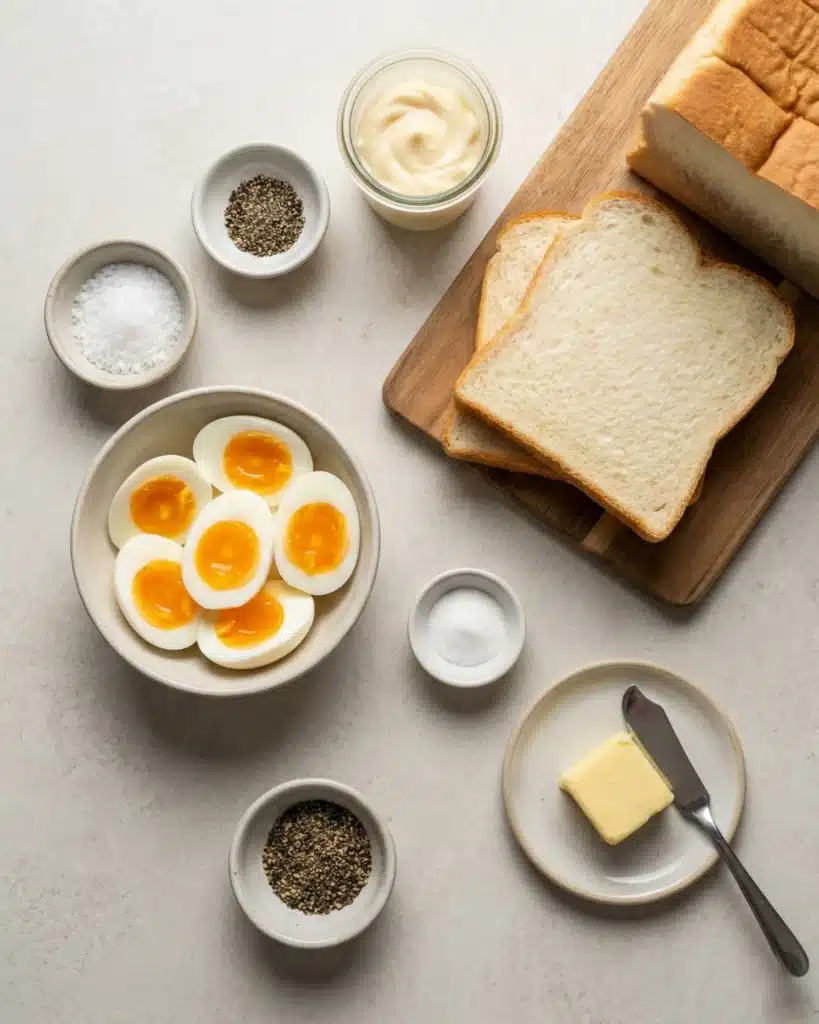
Because these ingredients are easy to find, this recipe works for home cooks, beginners, and busy professionals alike.
How to Make a Japanese Egg Sandwich Step-by-Step
Step 1: Boil the Eggs Correctly
To begin, decide whether you prefer a soft boiled egg texture or a firm hard boiled consistency. Because timing affects creaminess, keep a close eye on the clock. Place your eggs in a pot, cover them with water, and bring everything to a gentle boil. As a result, you will get perfectly set whites and tender yolks.
After boiling, immediately transfer the eggs to an ice bath. Since this stops the cooking process, it prevents chalky yolks and ensures smooth blending later.
Step 2: Prepare the Creamy Egg Filling
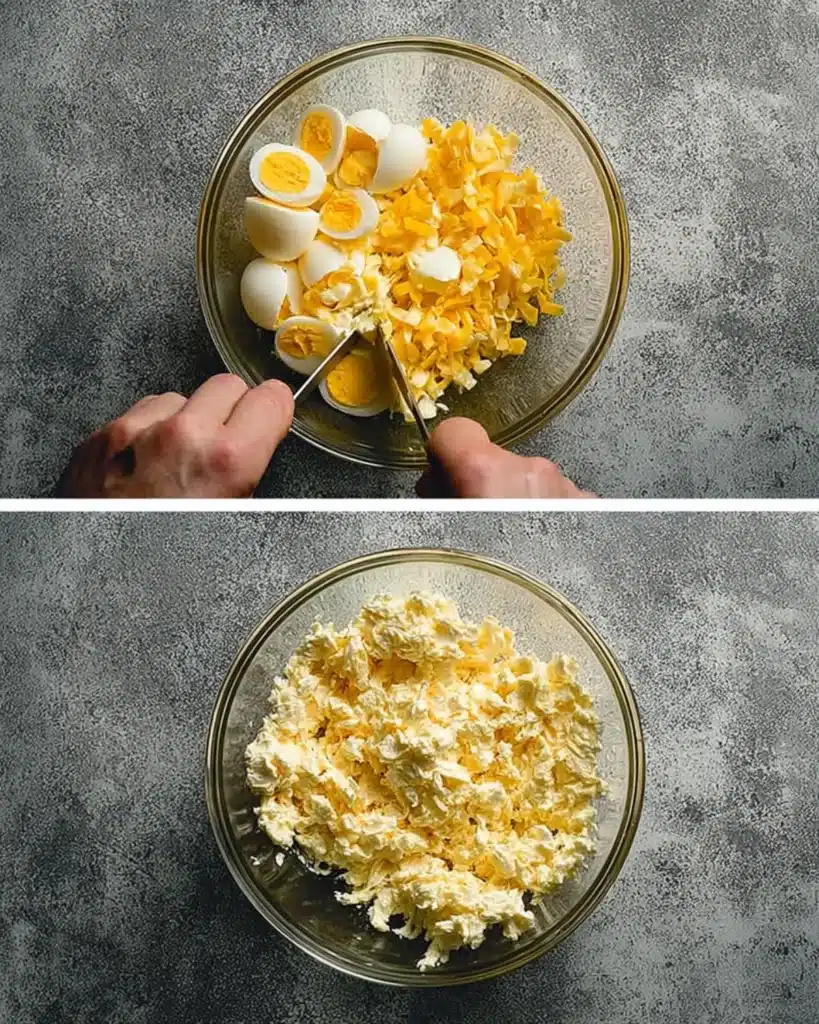
Once your eggs cool, peel them carefully. If you are using soft boiled eggs, peel slowly because the centers remain delicate. After peeling, place the eggs in a bowl and mash them lightly. As you mix, add Japanese mayo, salt, pepper, and optional sugar. Because the mayo blends best when added gradually, stir in small spoonfuls at a time.
The goal is to achieve a rich yet scoopable consistency. Since tamago sando should feel velvety and smooth, continue mixing until the filling looks dreamy and cohesive.
Step 3: Prepare and Assemble the Sandwich
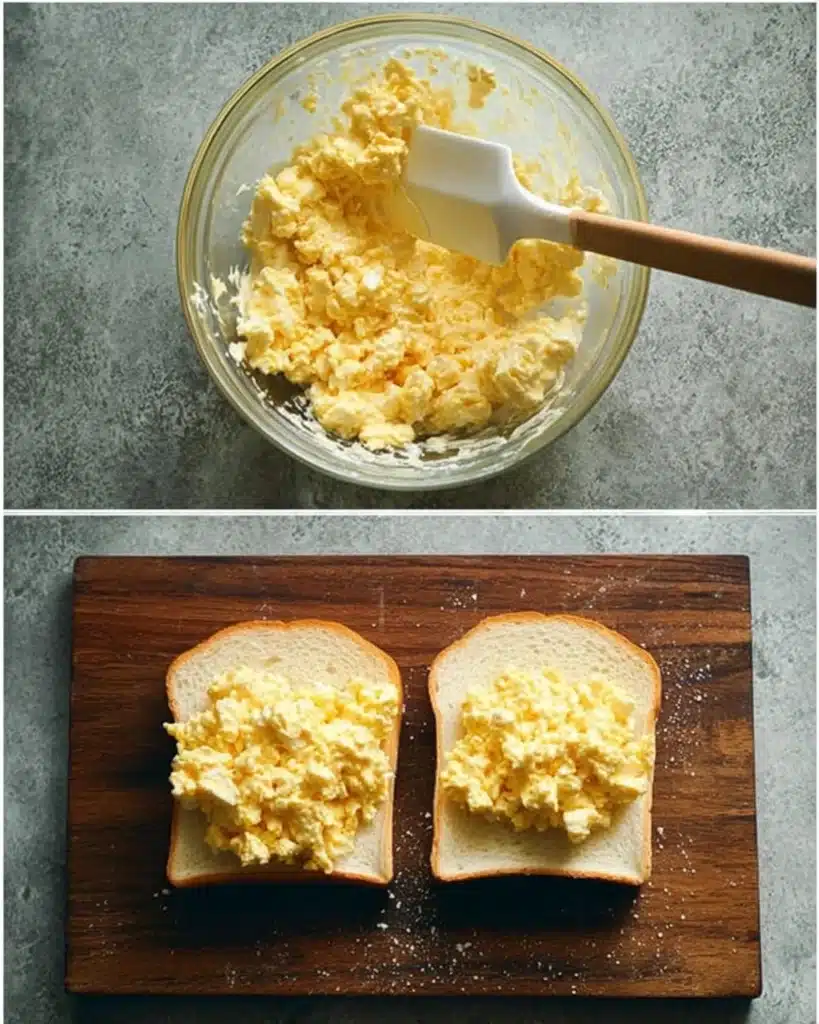
Now take your soft milk bread slices and spread a very thin layer of butter on each piece. Because butter prevents sogginess, this step helps maintain the sandwich’s shape. Next, add a generous layer of egg filling to one slice and spread it evenly.
Finally, press the second slice on top. For the classic Japanese look, trim the crusts carefully. As a result, your sandwich becomes irresistibly soft from edge to edge.
Step 4: Slice and Serve Your Japanese Egg Sandwich
Slice the sandwich straight down the middle to reveal the creamy center. Since presentation matters in Japanese cooking, clean, even cuts highlight how luxurious the filling is. Now your Japanese Egg Sandwich is ready for lunch, picnics, or a comforting afternoon snack.
Helpful Tips and Techniques for the Best Tamago Sando
Because small improvements lead to major results, these techniques help you achieve an authentic flavor and texture.
Use a Precise Egg-Boiling Method
If you prefer soft boiled eggs, aim for 7 minutes of simmering. However, if you like a firmer filling, boil for 10 minutes. Since consistency influences how smooth the filling becomes, choose your timing based on personal preference.
Mix the Filling Gently
Avoid mashing the eggs too aggressively. Because chunky pieces add structure, leaving a few small bits creates the perfect balance.
Choose the Right Bread
Shokupan is ideal, but if you cannot find it, choose the softest white bread available. Since the bread must hold the filling without falling apart, avoid thin slices.
Chill Before Serving
Although optional, chilling your sandwich for 10 minutes allows flavors to meld beautifully. As a result, tamago sando becomes even more satisfying.
How to Store a Japanese Egg Sandwich Properly
Because egg-based fillings must stay cool, store your sandwich in an airtight container in the refrigerator. If possible, wrap it gently in parchment before storing. As a result, the bread remains soft and the filling stays fresh.
Try to enjoy your tamago sando within 24 hours for the best texture.
Additional Lunch Inspiration to Pair with Your Japanese Egg Sandwich
A great lunch deserves great companions, so here are some meal ideas to explore.
- fluffy breakfast ideas similar to this Japanese Egg Sandwich recipe
- high-protein breakfast options to pair with your Japanese Egg Sandwich
- creative egg recipes like cloud eggs to explore more ways of cooking eggs
- another soft and delicate breakfast recipe such as Swedish pancakes
- healthy banana oatmeal muffins alongside your tamago sando
- a warm bowl of miso soup for a complete Japanese-style meal
- other breakfast breads like Greek yogurt bagels for morning variety
- this apple cinnamon cottage cheese bake

FAQs About Japanese Egg Sandwiches
A Japanese Egg Sandwich uses Japanese mayo, which creates a creamier and more delicate filling. Because the bread is softer and crustless, the sandwich tastes lighter and silkier.
Adding Japanese mayo slowly helps the mixture emulsify. Since soft boiled yolks naturally create a velvety texture, they enhance creaminess instantly.
Yes, you can. However, storing it in the refrigerator for more than a day may change the bread’s texture. Because tamago sando tastes best when fresh, prepare it the morning of or the night before.
Shokupan is the top choice. Since it holds moisture without becoming gummy, it supports the creamy filling perfectly.
Conclusion
A Japanese Egg Sandwich is a simple yet luxurious recipe that transforms everyday ingredients into a soft, creamy, and comforting meal. Because each step focuses on texture and balance, you can recreate the beloved tamago sando experience right at home. Whether you prepare it for lunch, meal prep, or a family picnic, this sandwich always delivers warmth and satisfaction.
Whether you’re a busy parent, a student grabbing lunch on the go, or anyone hungry for something wholesome and delicious, this recipe fits the bill. Don’t forget to leave a comment or tag us with your cooking success! Follow Daily Tasty Recipe on Pinterest and Instagram for more inspiration.

Japanese Egg Sandwich (Tamago Sando)
- Total Time: 20 minutes
- Yield: 2 sandwiches 1x
Description
A creamy, fluffy, and irresistible Japanese Egg Sandwich experience. This authentic Tamago Sando recipe delivers pure comfort and simplicity with every bite. Made with soft shokupan bread, rich yolks, and smooth Japanese mayo, it’s a lunchbox favorite across Japan and beyond. Perfect for picnics, bento boxes, or quick meals on the go.
Ingredients
- 4 large eggs (soft boiled or hard boiled)
- 3 tablespoons Japanese mayonnaise (Kewpie recommended)
- 4 slices soft milk bread (shokupan)
- Salt and pepper to taste
- 1/2 teaspoon sugar (optional, for sweetness)
- 1 tablespoon butter (for spreading)
Instructions
- Place eggs in a pot, cover with water, and bring to a gentle boil. Boil for 7 minutes for soft centers or 10 minutes for firm yolks.
- Immediately transfer eggs to an ice bath to stop cooking and cool completely.
- Peel the eggs carefully, then place them in a bowl and mash lightly with a fork.
- Add Japanese mayonnaise, salt, pepper, and sugar (if using). Mix gently until creamy and smooth.
- Lightly butter each slice of shokupan bread to prevent sogginess.
- Spread a generous amount of egg filling evenly on one slice of bread.
- Top with the second slice and gently press together.
- Trim the crusts off for an authentic Japanese look.
- Slice the sandwich in half to reveal the creamy filling.
- Serve immediately or chill for 10 minutes before serving for best flavor.
Notes
For authentic flavor, always use Japanese Kewpie mayonnaise and shokupan bread. If unavailable, choose soft, thick-cut white bread. Chill briefly before serving for a classic tamago sando experience. Best enjoyed within 24 hours. Pair with miso soup, fruit, or green tea for a complete Japanese-style meal.
- Prep Time: 10 minutes
- Cook Time: 10 minutes
- Category: Lunch
- Method: No-Cook / Boiled
- Cuisine: Japanese
Nutrition
- Serving Size: 1 sandwich
- Calories: 320
- Sugar: 3g
- Sodium: 420mg
- Fat: 22g
- Saturated Fat: 6g
- Unsaturated Fat: 14g
- Trans Fat: 0g
- Carbohydrates: 20g
- Fiber: 1g
- Protein: 12g
- Cholesterol: 190mg