

A Step-by-Step Guide to Perfect Malaysian Flatbread for Breakfast
If you’ve ever enjoyed the crisp, buttery layers of Malaysian flatbread at a street stall or café, you already know why this Flaky Roti Canai Recipe is a breakfast favorite. This soft yet crispy bread pairs beautifully with curry, soup, or even something sweet. Because it’s simple and versatile, it’s loved across Malaysia, Sri Lanka, and India alike. Today, we’re diving deep into how to make homemade roti canai that’s irresistibly flaky, tender, and full of flavor.
Jump To :
- The Story Behind Roti Canai
- Roti Canai vs. Roti Paratha vs. Godhambara Roti
- What You Need for This Flaky Roti Canai Recipe
- How to Make Flaky Roti Dough
- How to Shape and Stretch Roti Canai
- How to Create the Signature Layers
- Cooking the Roti Canai
- Serving Suggestions for Roti Canai Breakfast
- Tips for the Best Flaky Roti Canai
- FAQs About Flaky Roti Canai Recipe
- Conclusion

The Story Behind Roti Canai
Every food has a story, and roti canai is no exception. This traditional South Asian bread has roots in Indian and Sri Lankan cuisine, where versions like roti paratha and godhambara roti are common. Over time, Malaysian cooks transformed it into what we now know as roti canai a laminated flatbread that’s stretched, folded, and cooked to golden perfection. Because of its unique texture and buttery layers, it’s often described as both comforting and indulgent.
In addition, roti canai has become a symbol of Malaysian street food culture. You’ll find it served everywhere, from roadside stalls to high-end cafés. It’s often paired with dhal curry or spicy meat gravies, making it a dish that bridges cultures and generations. Whether eaten plain or filled, the flaky roti dough is loved by everyone who tastes it.
Roti Canai vs. Roti Paratha vs. Godhambara Roti
Though they share similarities, these breads have distinctive qualities. Roti paratha, popular in India, is layered with ghee or butter and folded before cooking. Sri Lanka’s godhambara roti is thinner and typically used to wrap fillings. Meanwhile, roti canai has a slightly chewy texture with those irresistible crispy layers. The method of stretching roti canai gives it that signature flakiness. As a result, this bread stands out as one of the most authentic roti recipes you can make at home.
Because the cooking method differs across regions, understanding these variations helps you master the art of traditional South Asian bread. If you love experimenting, try combining techniques from different cuisines to create your own signature roti style. For example, you can use the coiled roti method with a touch of ghee for added richness.
What You Need for This Flaky Roti Canai Recipe
You’ll only need a handful of pantry staples to make this Malaysian flatbread. Each ingredient plays an important role in the dough’s texture and flavor.
Ingredients
- 2 ½ cups all-purpose flour
- 1 teaspoon salt
- 1 teaspoon sugar
- 2 tablespoons ghee or melted butter
- ¾ cup water (adjust as needed)
- 2 tablespoons oil for coating
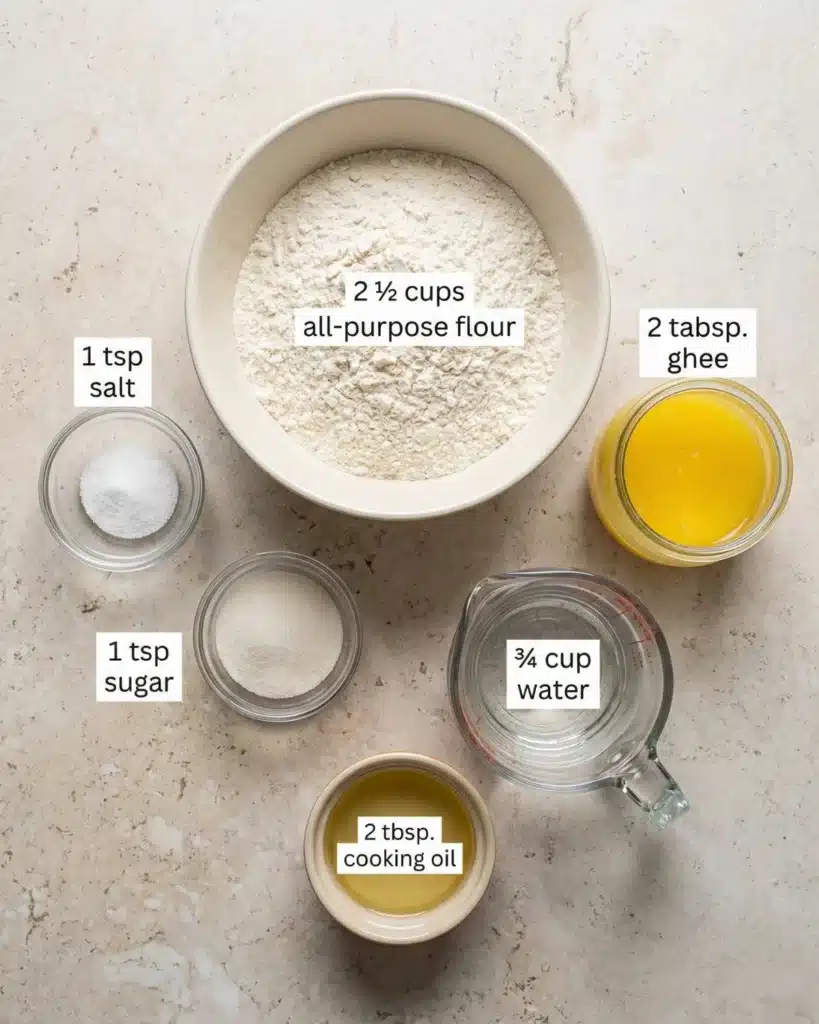
Because balance is key, avoid adding too much water. The dough should be soft but not sticky. For those who prefer vegan versions, replace ghee with oil and the texture will still remain light and flaky.
How to Make Flaky Roti Dough
Step 1: Mixing the Dough
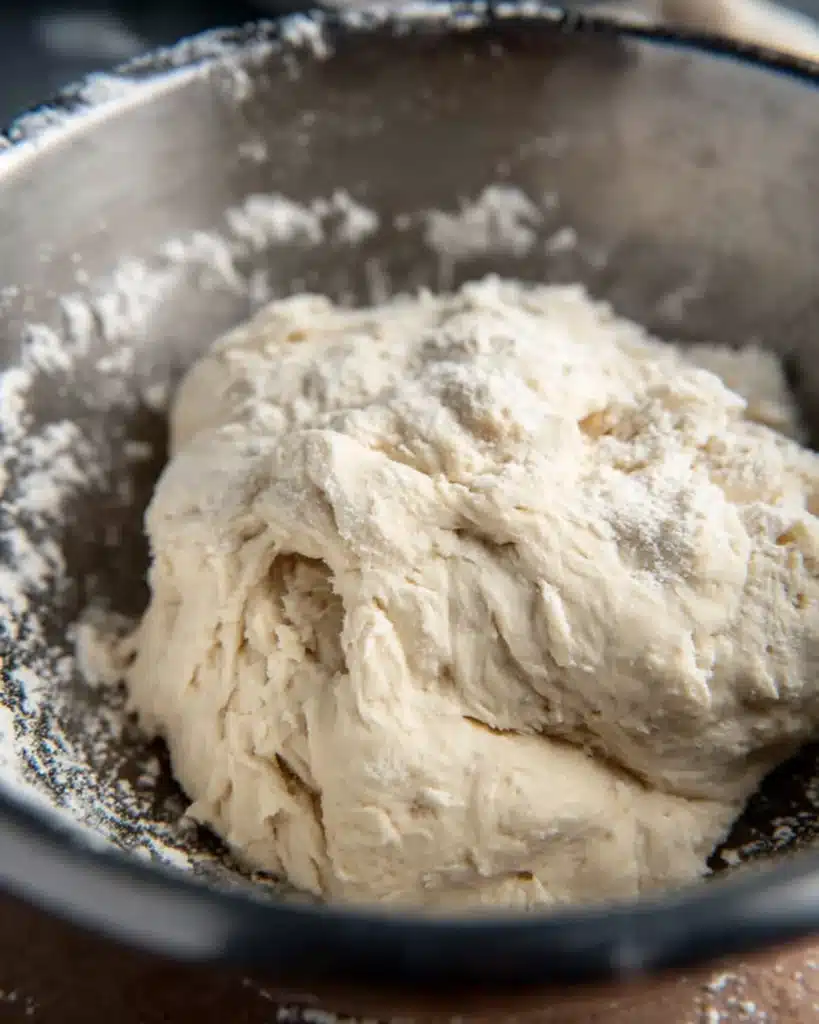
First, combine flour, sugar, and salt in a large bowl. Gradually add water while kneading. Because hydration affects texture, go slow until the dough forms a smooth ball. Add ghee and knead for 10 minutes until elastic. If you have a food processor, use it for faster results without compromising texture.
Step 2: Resting the Dough
Coat the dough lightly with oil and cover it with a damp cloth. Let it rest for at least 2 hours. This rest period allows gluten to relax, resulting in a pliable and flaky roti dough that’s easier to stretch. If you’re short on time, even a 45-minute rest helps improve flexibility.
How to Shape and Stretch Roti Canai
Step 3: Dividing and Oiling
Divide the dough into small balls and roll each one in oil. Rest again for 30 minutes. This extra step ensures the dough stretches thinly without tearing. Because oil prevents the dough from drying out, it also enhances the flakiness.
Step 4: Stretching the Dough
On a clean surface, flatten each dough ball. Then, use your hands to gently stretch it until almost transparent. Because patience matters here, stretch gradually rather than forcing it. This creates the base for those signature crispy roti layers. Practice helps—each time, your technique will improve and the dough will stretch more evenly.
How to Create the Signature Layers
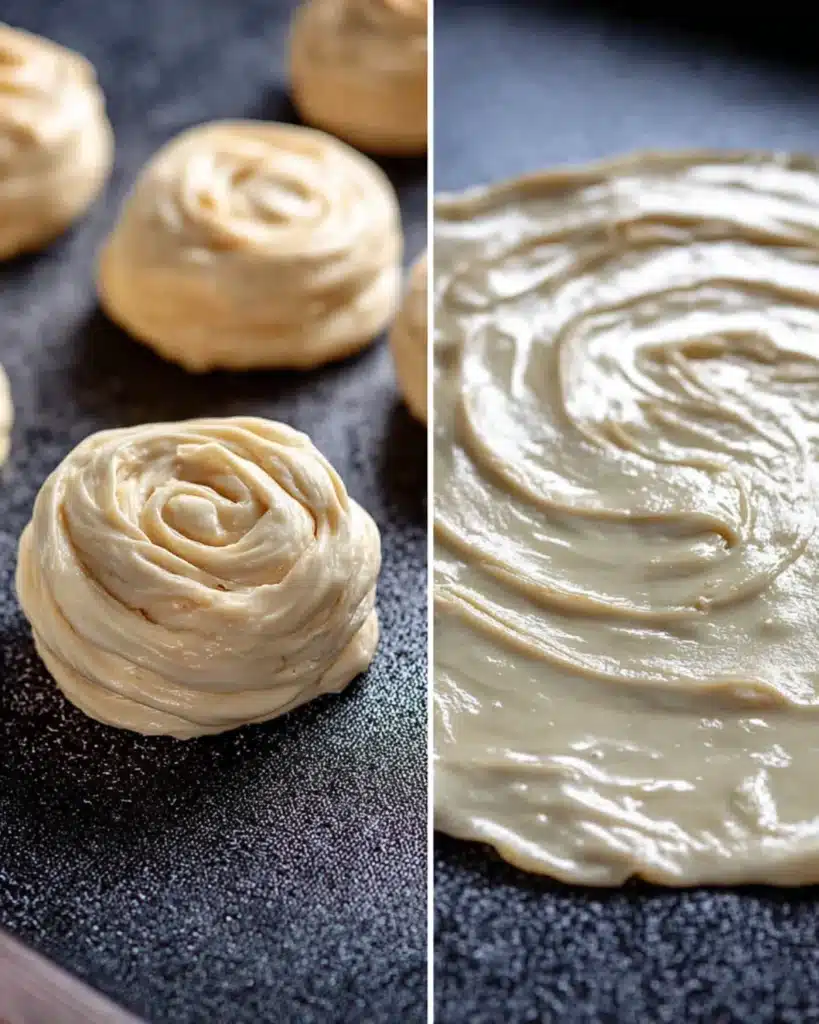
Brush each stretched sheet with melted ghee or butter. Then fold it inward from the sides to form a long strip. Coil it into a spiral, similar to the coiled roti method, and flatten gently before cooking. This lamination process gives you a soft and flaky roti every time.
For an even richer taste, alternate layers of ghee and oil. This step ensures that each bite delivers a crisp exterior and soft interior. In addition, using room-temperature ghee helps it spread more evenly, enhancing the final texture.
Cooking the Roti Canai
Step 5: Heating the Pan
Preheat a non-stick pan for roti over medium heat. Add a small amount of oil and place one piece of dough on it. Cook for 2 minutes per side until golden brown and crisp. You’ll notice small air pockets forming, a good sign that your flaky bread recipe is on the right track.
Step 6: The Final Fluff
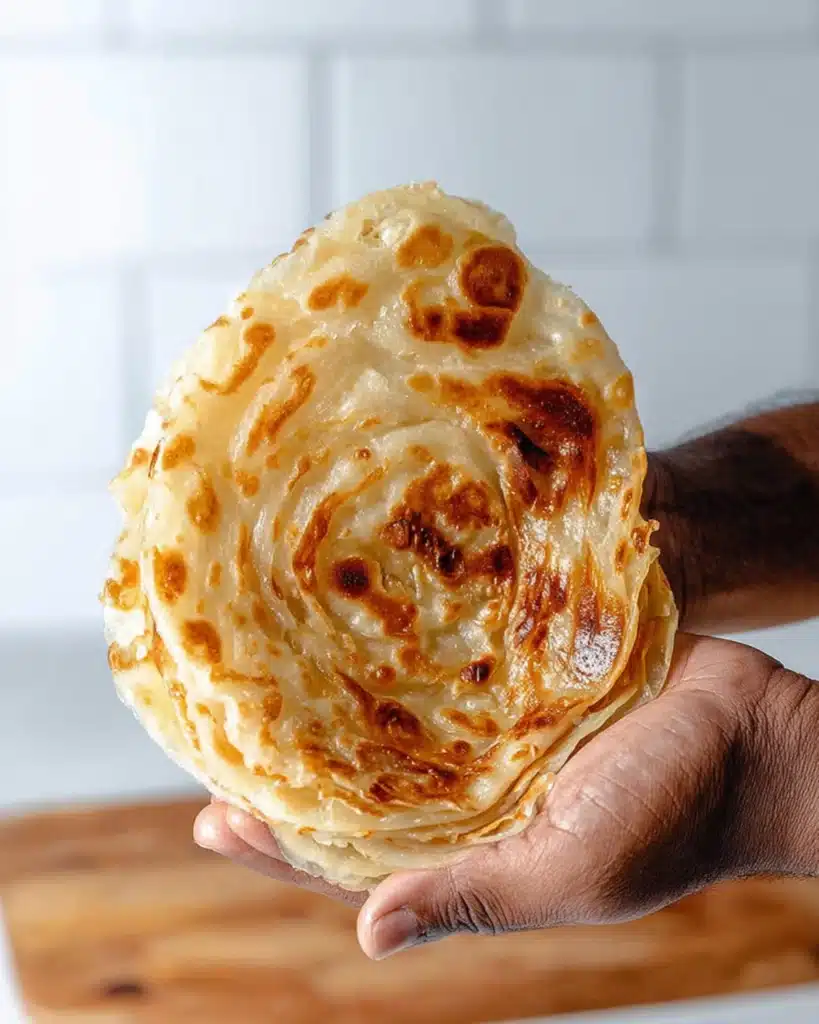
After cooking, lightly press the roti between your palms to separate the layers. As a result, you’ll see the flaky texture bloom beautifully. Repeat the process for all dough pieces, and soon your kitchen will fill with the irresistible aroma of freshly cooked ghee roti canai.
Serving Suggestions for Roti Canai Breakfast
There are endless ways to enjoy your Flaky Roti Canai Recipe. For a classic breakfast, serve it with roti canai with curry, such as a rich Homemade Butter Chicken. If you prefer something lighter, try it with Pumpkin and Leek Soup. You can even pair it with a bowl of Egg Drop Soup for a warming start to your day.
For a healthier breakfast, combine your roti with a refreshing Chickpea Feta Avocado Salad. Or, if you crave something crunchy, add Spicy Roasted Chickpeas as a savory filling. You can also enjoy roti as part of a global fusion meal with Thai Peanut Chicken Wraps.
Variations and Creative Ideas
Because roti canai is so adaptable, you can transform it for any occasion. Try dessert roti canai with condensed milk and sugar or a savory version with eggs and herbs. Some even use it as a wrap for grilled meats or vegetables. You can also explore sweet roti canai variations using bananas or coconut for a tropical twist.
In addition, you can create a layered butter roti recipe by brushing melted butter before folding the dough. If you’re preparing brunch, pair roti canai with Healthy Lentil Soup or Chicken and Rice Soup for a satisfying combination.
Tips for the Best Flaky Roti Canai
- Always rest the dough; this step is non-negotiable.
- Use ghee instead of oil for richer flavor.
- Don’t skip the gentle pressing step it’s how you reveal the flaky layers.
- Practice the stretching technique; the thinner, the flakier.
- Let cooked roti rest for a minute before serving to retain moisture.
Because practice makes perfect, don’t worry if your first few attempts aren’t flawless. Once you get the feel of the dough, you’ll be making roti canai from scratch with confidence.
FAQs About Flaky Roti Canai Recipe
Yes. You can refrigerate the dough overnight and cook it fresh the next morning. Just bring it to room temperature before stretching.
Simply omit the egg this recipe works beautifully without it. The key to softness lies in the kneading and resting process.
All-purpose flour gives the best balance between elasticity and softness. However, you can mix in a little bread flour for extra chewiness.
Absolutely. A griddle or flat non-stick pan works perfectly. Just ensure even heat distribution for uniform cooking.
Yes, once cooked, let them cool completely, then freeze in airtight bags. Reheat on a skillet when ready to serve, and they’ll regain their crispness.
Conclusion
Making a Flaky Roti Canai Recipe at home is not only rewarding but also a delicious way to connect with culinary traditions from Malaysia, India, and Sri Lanka. Once you master the kneading roti dough, oil layering roti, and stretching roti canai techniques, you’ll find yourself making this flatbread again and again. Because it’s so versatile, you can serve it with curries, soups, or even sweets.
Whether you’re a busy parent, a student grabbing breakfast on the go, or anyone hungry for something wholesome and delicious, this recipe fits the bill. Don’t forget to leave a comment or tag us with your cooking success! Follow Daily Tasty Recipe on Pinterest and Instagram for more inspiration.

Flaky Roti Canai Recipe
- Total Time: 2 hours 50 minutes
- Yield: 6 rotis 1x
Description
This Flaky Roti Canai Recipe is the ultimate guide to making perfect Malaysian flatbread for breakfast. Soft, buttery, and irresistibly crispy, it pairs beautifully with curry, soup, or even sweet toppings. Learn how to knead, stretch, and layer your dough to achieve authentic street-style texture right at home.
Ingredients
- 2 ½ cups all-purpose flour
- 1 teaspoon salt
- 1 teaspoon sugar
- 2 tablespoons ghee or melted butter
- ¾ cup water (adjust as needed)
- 2 tablespoons oil for coating
Instructions
- Mix the Dough: In a large bowl, combine flour, sugar, and salt. Gradually add water while kneading until a smooth, soft dough forms. Add ghee and knead for 10 minutes until elastic.
- Rest the Dough: Coat the dough lightly with oil, cover with a damp cloth, and let rest for at least 2 hours (or 45 minutes if short on time).
- Divide and Oil: Divide the dough into small balls, roll in oil, and let rest for another 30 minutes.
- Stretch the Dough: Flatten each ball and gently stretch with your hands until almost transparent.
- Layer and Coil: Brush each sheet with melted ghee, fold into a strip, coil into a spiral, and flatten gently.
- Cook the Roti: Heat a non-stick pan over medium heat with a little oil. Cook each roti for 2 minutes per side until golden brown and crisp.
- Fluff and Serve: Lightly press cooked roti between your palms to separate layers. Serve warm with curry, soup, or sweet toppings.
Notes
Resting the dough is essential for elasticity and flakiness. For vegan versions, replace ghee with oil. You can also make sweet variations by adding condensed milk or coconut. Freeze cooked roti for later—just reheat on a skillet to restore crispness.
- Prep Time: 2 hours 30 minutes
- Cook Time: 20 minutes
- Category: Breakfast
- Method: Pan-Fried
- Cuisine: Malaysian
Nutrition
- Serving Size: 1 roti
- Calories: 210
- Sugar: 1g
- Sodium: 180mg
- Fat: 10g
- Saturated Fat: 4g
- Unsaturated Fat: 5g
- Trans Fat: 0g
- Carbohydrates: 26g
- Fiber: 1g
- Protein: 4g
- Cholesterol: 15mg