
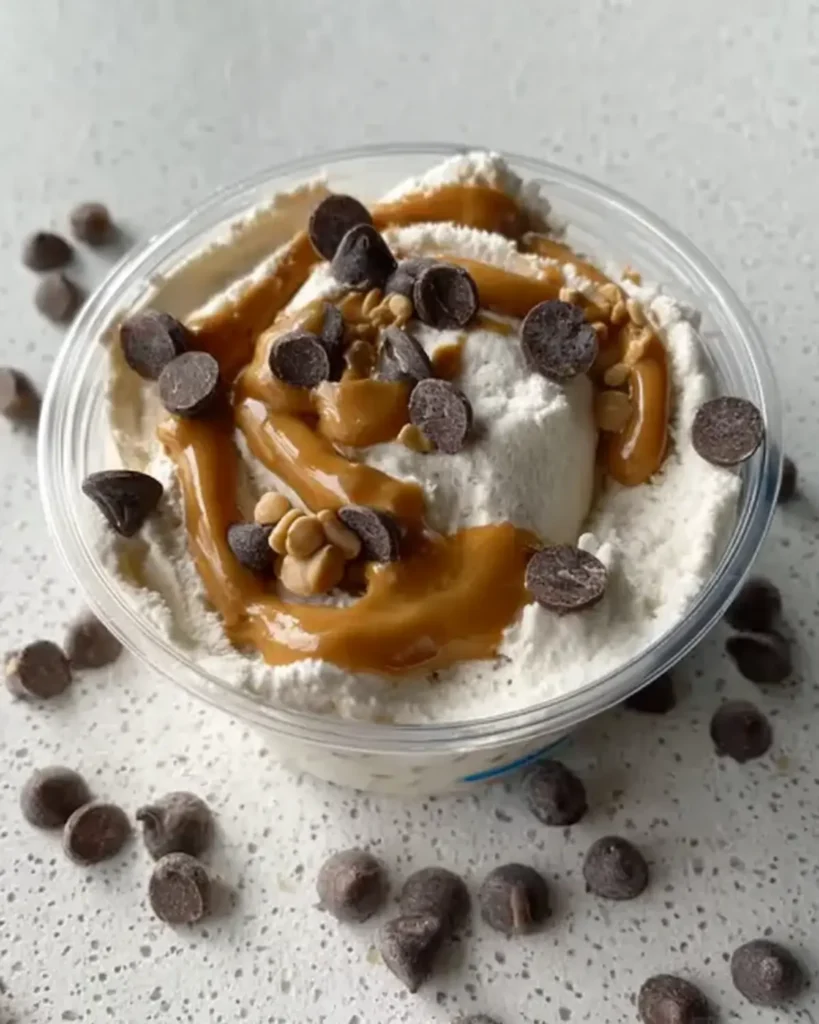
The Ultimate Macro-Friendly Frozen Snack for Busy Days
As a seasoned chef with years of culinary experience, I enjoy turning modern tools into reliable kitchen favorites, and this ninja creami ice cream is one of them. By blending classic technique with the Ninja Creami, I create desserts that stay creamy and flavorful without extra fuss. My goal is to help home cooks make treats that feel indulgent yet still fit everyday routines, and this recipe delivers exactly that.
If you have been looking for the perfect ninja creami chocolate protein ice cream, this recipe is exactly what you need. Not only does it skip the pudding mix, but it also delivers a rich chocolate flavor with a smooth, creamy texture that feels indulgent while staying macro-friendly. Because this recipe is designed for real life, it fits beautifully into busy schedules, post-workout routines, and healthy snack plans. At Daily Tasty Recipe, we believe snacks should be both satisfying and nourishing, and this one absolutely delivers.
Moreover, this ninja creami chocolate protein ice cream is simple to prepare, requires minimal ingredients, and gives you full control over sweetness and texture. As a result, you avoid artificial thickeners while still achieving that signature scoopable finish. Therefore, whether you are a student managing calories, a working professional balancing macros, or a parent looking for a smarter sweet treat, this chocolate protein dessert fits perfectly into your Snacks routine.
Jump To :
- Why This Ninja Creami Chocolate Protein Ice Cream Works
- Ingredients for Ninja Creami Chocolate Protein Ice Cream
- Tools Needed
- How to Make Ninja Creami Chocolate Protein Ice Cream Step by Step
- Texture Tips for Perfect Ninja Creami Chocolate Protein Ice Cream
- How to Improve Stability in Your Chocolate Protein Ice Cream
- How Spinning Techniques Affect Chocolate Protein Ice Cream
- Ways to Add Volume to Chocolate Protein Ice Cream
- How Serving Temperature Influences Chocolate Protein Ice Cream
- Flavor Variations for Ninja Creami Chocolate Protein Ice Cream
- Pairing Chocolate Protein Ice Cream With Savory Snacks
- Nutritional Macros and Benefits
- Common Mistakes and How to Avoid Them
- Using the Ninja Creami for Creative Chocolate Desserts
- FAQs About Ninja Creami Chocolate Protein Ice Cream
- About the Recipe Author
- Conclusion
Why This Ninja Creami Chocolate Protein Ice Cream Works
First of all, the structure of this recipe is built around balance. Because protein powders can sometimes create a chalky or powdery texture, we combine whole milk, high-quality chocolate protein powder, and a small amount of guar gum or xanthan gum to stabilize the base. As a result, the freezing point remains balanced, which prevents the pint from turning rock hard.
In addition, a touch of monk fruit sweetener paired with a small amount of pure maple syrup ensures that the sweetness tastes natural rather than artificial. Therefore, the texture remains creamy instead of icy. Furthermore, blending the mixture thoroughly eliminates clumps, which significantly improves the final consistency.
Most importantly, this recipe focuses on clean ingredients. Because we skip sugar-free pudding mix, you get a ninja creami chocolate protein ice cream that tastes like real chocolate ice cream rather than a diet substitute. Consequently, every spoonful feels indulgent while staying aligned with healthy snack goals.
Ingredients for Ninja Creami Chocolate Protein Ice Cream
- 1 cup whole milk
- 1 scoop chocolate protein powder
- 1 tablespoon monk fruit sweetener
- 1 teaspoon pure maple syrup
- 1 teaspoon unflavored collagen
- 1 pinch guar gum or xanthan gum
- Optional: 1 tablespoon unsweetened cocoa powder for deeper chocolate flavor
- Optional mix-ins: dark chocolate chips, chopped nuts, crushed protein cookies

Because ingredient quality directly affects the outcome, choose a protein powder that dissolves smoothly. A simple whey isolate with minimal additives tends to provide the best texture, while overly processed or heavily sweetened blends can disrupt freezing and create an icy finish. Selecting a clean, easy-mixing powder helps the base freeze evenly and results in a creamier final scoop.
Tools Needed
This post may contain affiliate links. As an Amazon Associate, Daily Tasty Recipe earns from qualifying purchases at no extra cost to you.
To prepare this ninja creami chocolate protein ice cream, you will need:
- Ninja Creami machine
- Blender or shaker bottle
- Ninja Creami pint container
- Measuring cups and spoons
- Spatula
Because proper freezing is essential, always use the correct pint container and ensure the surface freezes completely flat. Otherwise, the blade may struggle during the spin cycle. Therefore, paying attention to this small detail prevents machine damage and improves results.
How to Make Ninja Creami Chocolate Protein Ice Cream Step by Step
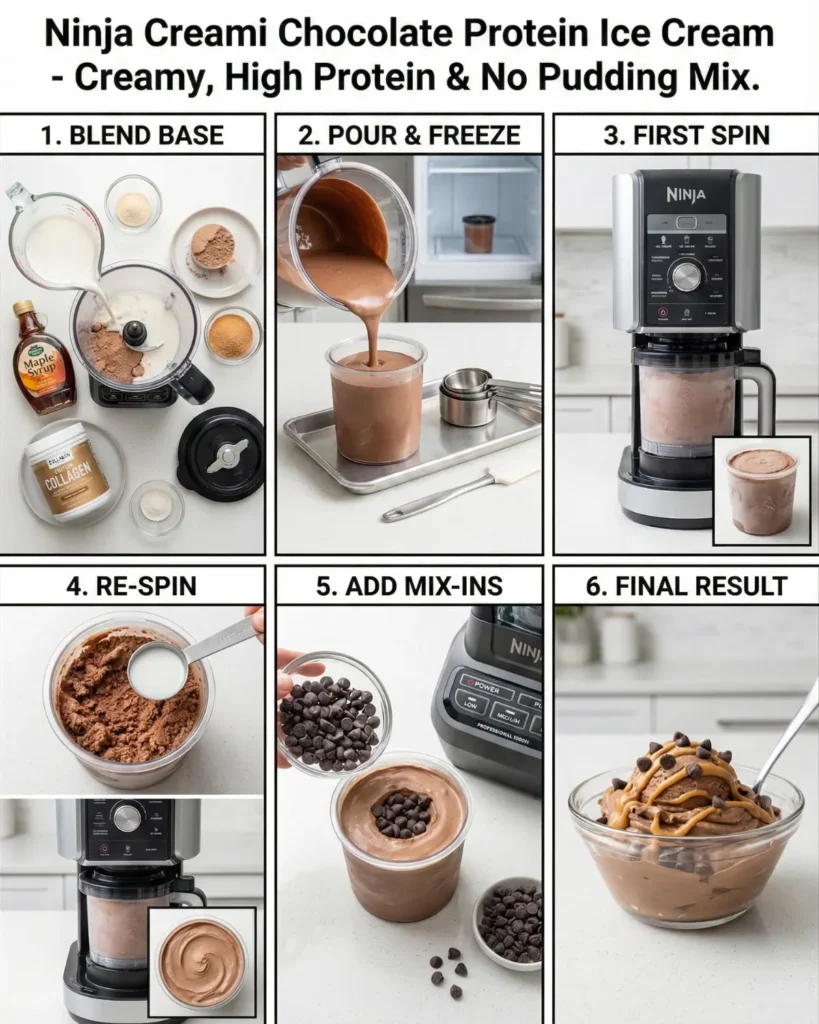
Step 1 Blend the Chocolate Protein Base
First, add whole milk, chocolate protein powder, monk fruit sweetener, maple syrup, collagen, and guar gum into a blender. Then blend until the mixture becomes completely smooth. Because protein powder can clump easily, blending thoroughly prevents a grainy texture later. As a result, your base will freeze evenly and spin smoothly.
Step 2 Pour and Freeze Properly
Next, pour the mixture into your Ninja Creami pint container. After that, gently tap the container on the counter to release air bubbles. Then place the pint on a level surface in the freezer. Because freezing time impacts texture, allow at least 12 hours, although 24 hours produces the best structure. Therefore, planning ahead ensures optimal creaminess.
Step 3 First Spin Cycle
Once fully frozen, insert the pint into the Ninja Creami machine. Select the Lite Ice Cream or Ice Cream setting depending on your model. Because the machine shaves the frozen block into fine layers, the first spin transforms the solid base into a soft, crumbly texture.
Step 4 Re-Spin for Creaminess
If the texture appears powdery, which is common with protein recipes, add one tablespoon of milk to the center. Then use the Re-Spin function. As a result, the mixture binds together into a creamy consistency. Therefore, do not worry if the first spin looks crumbly, because the re-spin cycle is designed to fix exactly that issue.
Step 5 Add Mix-Ins if Desired
Finally, create a small well in the center of the ice cream and add chocolate chips or nuts. Then press the Mix-In function. Because this setting folds ingredients gently rather than fully blending them, your mix-ins remain evenly distributed. Consequently, every bite has balanced texture and flavor.
Texture Tips for Perfect Ninja Creami Chocolate Protein Ice Cream
Because protein affects how the base freezes, paying attention to texture is essential. If the ice cream turns too firm, a richer liquid base can help soften it. If it feels too soft, slightly reducing the liquid can improve structure.
In addition, always freeze the pint with the lid off to prevent a ‘freezer hump’ from forming in the middle. When the center freezes higher than the edges, it can interfere with the machine’s blade and lead to uneven spinning. Flattening the top before freezing ensures a smooth, safe cycle.
Furthermore, avoid using too much gum. While gums can help stabilize the mixture, even a little extra can create a gummy finish. A small pinch is enough to support the texture without overpowering it.
How to Improve Stability in Your Chocolate Protein Ice Cream
Using Low-Sugar Stabilizers for Better Texture
Because protein bases can become unstable during freezing, adding gentle stabilizers can improve structure without changing flavor. A small amount of gelatin or collagen creates a smoother, more stable scoop that holds together better after re-spinning. In addition, this approach keeps the texture consistent if you enjoy slower snacking or pairing your dessert with other foods. For example, this method complements options like the Bariatric Gelatin Healthy Snack Recipe which also relies on balanced texture. Therefore, using a clean stabilizer helps keep the ice cream creamy from start to finish.
Using Chilled Ingredients for Better Spin Results
Starting with cold ingredients helps the base freeze evenly, making it easier for the Ninja Creami to shave the mixture smoothly. When liquids are already chilled, the freezing process becomes more consistent, which reduces the chance of developing icy spots. Moreover, chilled ingredients blend more easily with protein powder, avoiding clumps that cause uneven spinning. As a result, the final texture becomes softer and more predictable. Therefore, preparing your ingredients ahead of time is an easy step that improves the overall performance of the recipe.
How Spinning Techniques Affect Chocolate Protein Ice Cream
Adjusting Spin Speed for Better Consistency
Although the Ninja Creami automates most of the spinning process, understanding how the settings affect texture helps you fine-tune results. Using the Lite Ice Cream setting produces a softer texture, while the regular Ice Cream setting creates a firmer scoop. In addition, the re-spin function blends remaining icy spots into a smoother finish. Therefore, experimenting with spin settings allows you to match the ice cream to your personal preference, whether you like a soft-serve feel or a firmer spoonful.
Using Pause-and-Scrape for Thick Mixes
When the mixture becomes very thick, pausing the spin to scrape down the sides helps the machine process it more evenly. Because protein bases can stick to the container walls, this technique prevents unmixed patches that affect texture. Moreover, scraping ensures that all ingredients reach the blade, resulting in a smoother and more consistent ice cream. Therefore, using a quick pause-and-scrape improves both flavor distribution and texture.
Ways to Add Volume to Chocolate Protein Ice Cream
Using Air Incorporation Techniques
Because volume makes a dessert feel more satisfying, incorporating a little air into the mixture can improve the final scoop. Blending the base longer or adding it to the container at a slight angle increases air pockets, which creates a lighter texture. Moreover, the creaminess improves during the re-spin because the blade softens these pockets. Therefore, using this simple technique gives your ice cream a fluffier feel without adding calories.
Adding Natural Volume Boosters
Some ingredients naturally increase volume during blending. For example, adding a spoonful of Greek yogurt or cottage cheese creates body while remaining high in protein. In addition, these ingredients help stabilize the base, making the texture smoother after spinning. Therefore, incorporating natural volume boosters gives the ice cream fullness and improves mouthfeel.
How Serving Temperature Influences Chocolate Protein Ice Cream
Letting the Ice Cream Rest Before Serving
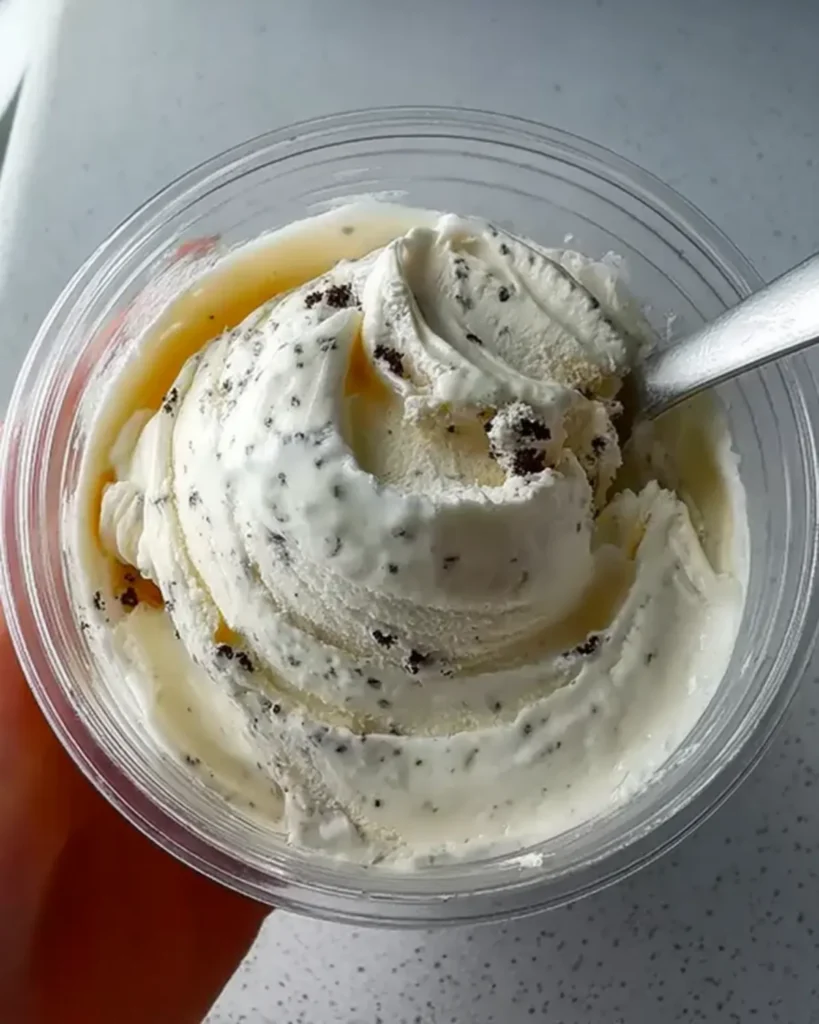
Although the Creami produces a ready-to-eat texture, letting the ice cream rest for a minute can improve flavor. Because cold temperatures mute sweetness, a short rest helps the chocolate taste more pronounced. Moreover, the texture becomes softer and more scoopable. Therefore, allowing the ice cream to warm slightly enhances both flavor and mouthfeel.
Chilling Bowls for Longer Creaminess
Serving the dessert in chilled bowls helps maintain its creamy texture longer. Because warm dishes cause the ice cream to melt quickly, cold bowls slow the process and preserve structure. Moreover, the contrast between the chilled bowl and the chocolate ice cream keeps each bite enjoyable. Therefore, using cold serving dishes is an easy way to improve presentation.
Flavor Variations for Ninja Creami Chocolate Protein Ice Cream
Because chocolate is versatile, you can easily adjust this recipe. For example, adding espresso powder deepens the chocolate profile. In contrast, a few drops of peppermint extract create a refreshing twist.
Additionally, you can swirl in peanut butter after the first spin for a chocolate peanut butter version. As a result, the ice cream becomes richer while maintaining high protein content.
Moreover, if you enjoy pairing snacks, this frozen treat complements our High Protein Breakfast Bowl Recipe for a balanced day of protein-rich meals. Likewise, for a lighter sweet option, you can explore The Viral Gelatin Trick Recipe at which offers another creative snack idea.
Pairing Chocolate Protein Ice Cream With Savory Snacks
Balancing Sweet and Savory for a Better Snack Experience
Because contrast enhances flavor, pairing chocolate ice cream with something savory creates a satisfying balance. A salty side emphasizes the sweetness in the ice cream while keeping the overall snack interesting. For instance, serving it with the Ultimate Loaded Fries Recipe which creates an unexpected but enjoyable sweet-and-savory moment. In addition, mixing warm and cold elements improves the sensory experience. Therefore, combining savory snacks with your protein ice cream turns simple snacking into something more dynamic and memorable.
Using Light Salty Toppings for Flavor Enhancement
A sprinkle of crushed salted nuts or a light dusting of sea salt enhances the chocolate flavor without overpowering it. Because salt naturally boosts sweetness, these toppings help the ice cream taste richer and more balanced. Moreover, salty textures contrast beautifully with the creamy base, creating a more enjoyable spoonful. This approach works especially well when serving guests who enjoy complex flavors without heavy ingredients. Therefore, adding subtle savory elements provides an easy way to elevate your dessert.
Nutritional Macros and Benefits
Below is a general look at the nutritional profile of this recipe. Because the base is made with whey isolate, it remains naturally low in fat while offering a generous amount of protein. This balance makes it a satisfying option for those who want a treat that still supports their daily wellness goals. The overall structure of the recipe keeps sugars modest, carbohydrates moderate, and protein notably high, creating a frozen snack that feels indulgent yet aligns with balanced eating habits. A touch of collagen further enhances texture and adds gentle digestive benefits, allowing each serving to be both enjoyable and functional.
Common Mistakes and How to Avoid Them
If your ice cream turns icy, you may have reduced sweetener too much. Because sweetness influences freezing point, a small amount helps maintain softness. Therefore, do not eliminate sweetener entirely.
If the blade seems strained, check that the base froze flat. Because uneven freezing can stress the machine, proper preparation prevents damage. Consequently, always double-check before spinning.
If flavor feels dull, consider adding a pinch of salt. Because salt enhances chocolate notes, even a tiny amount can dramatically improve taste. As a result, the dessert tastes more balanced and rich.
Using the Ninja Creami for Creative Chocolate Desserts
Making High-Protein Chocolate Milkshakes
Because the Creami creates such a smooth base, it can easily transform into a thick, high-protein milkshake. Simply blend the finished ice cream with a splash of milk until pourable. In addition, adding cocoa or espresso deepens the flavor. Therefore, this method gives you another way to enjoy the same recipe with very little effort.
Creating Chocolate Soft-Serve Style Desserts
Running the mixture through an extra re-spin produces a softer, fluffier texture similar to soft-serve. Because the blade continues shaving the ice cream into finer layers, the scoop becomes lighter and smoother. Therefore, this option works well when you want a gentler texture that still feels rich and satisfying.
FAQs About Ninja Creami Chocolate Protein Ice Cream
Because protein mixtures freeze solid, the first spin often looks crumbly. Therefore, adding a splash of milk and using the re-spin cycle fixes the issue.
Yes. In fact, this recipe is specifically designed without pudding mix, which keeps ingredients cleaner and simpler.
Freeze for at least 12 hours. However, 24 hours produces better results.
Yes, although texture may vary slightly. Therefore, you may need an extra pinch of guar gum for stability.
Always freeze the mixture flat and never spin a partially frozen base.
Refreeze the pint with a smooth surface. Then re-spin before serving again.
About the Recipe Author
Because authenticity and trust matter, I personally test every Creami recipe in the Daily Tasty Recipe kitchen. With years of experience creating macro-friendly treats and hands-on testing of texture troubleshooting, I ensure that every step in this guide reflects real results not theory. Therefore, readers can follow the process confidently, knowing each stage has been validated through practical cooking experience.
Conclusion
Because snacks should be both enjoyable and nourishing, this ninja creami chocolate protein ice cream proves that healthy choices do not require sacrificing flavor. Moreover, its simple preparation makes it realistic for everyday life. As a result, it becomes a reliable go-to dessert that fits seamlessly into balanced eating habits.
Whether you’re a busy parent, a student grabbing Snacks on the go, or anyone hungry for something wholesome and delicious, this recipe fits the bill. Don’t forget to leave a comment or tag us with your cooking success! Follow Daily Tasty Recipe on Pinterest and instagram for more inspiration.
Print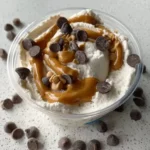
Ninja Creami Chocolate Protein Ice Cream
- Total Time: 12 hours 5 minutes
- Yield: 1 pint (2 servings) 1x
Description
If you have been looking for the perfect ninja creami chocolate protein ice cream, this recipe is exactly what you need. Not only does it skip the pudding mix, but it delivers a rich chocolate flavor with a smooth, creamy texture that feels indulgent while staying macro-friendly. Designed for real life, it fits beautifully into busy schedules, post-workout routines, and healthy snack plans. Simple ingredients, balanced sweetness, and a creamy finish make this frozen treat a reliable go-to for anyone who wants a satisfying, high-protein dessert without artificial thickeners.
Ingredients
- 1 cup whole milk
- 1 scoop chocolate protein powder
- 1 tablespoon monk fruit sweetener
- 1 teaspoon pure maple syrup
- 1 teaspoon unflavored collagen
- 1 pinch guar gum or xanthan gum
- 1 tablespoon unsweetened cocoa powder (optional)
- Dark chocolate chips (optional mix-in)
- Chopped nuts (optional mix-in)
- Crushed protein cookies (optional mix-in)
Instructions
- Add whole milk, chocolate protein powder, monk fruit sweetener, maple syrup, collagen, and guar gum into a blender.
- Blend until completely smooth and no clumps remain.
- Pour the mixture into the Ninja Creami pint container.
- Tap the container gently on the counter to release air bubbles and smooth the top.
- Freeze on a level surface for at least 12 hours, preferably 24 hours.
- Insert the frozen pint into the Ninja Creami machine.
- Select the Lite Ice Cream or Ice Cream setting and run the first spin cycle.
- If the texture appears crumbly, add 1 tablespoon milk to the center.
- Use the Re-Spin function until creamy and smooth.
- Create a small well, add mix-ins if desired, and press the Mix-In function.
Notes
Freeze the pint with a flat surface to prevent blade strain. Do not skip the re-spin step if the texture looks powdery. A small pinch of salt can enhance the chocolate flavor. Adjust sweetness based on your protein powder preference.
- Prep Time: 5 minutes
- Cook Time: 0 minutes
- Category: Snacks
- Method: Frozen
- Cuisine: American
Nutrition
- Serving Size: 1/2 pint
- Calories: 180
- Sugar: 4g
- Sodium: 150mg
- Fat: 6g
- Saturated Fat: 3g
- Unsaturated Fat: 2g
- Trans Fat: 0g
- Carbohydrates: 8g
- Fiber: 1g
- Protein: 24g
- Cholesterol: 15mg