
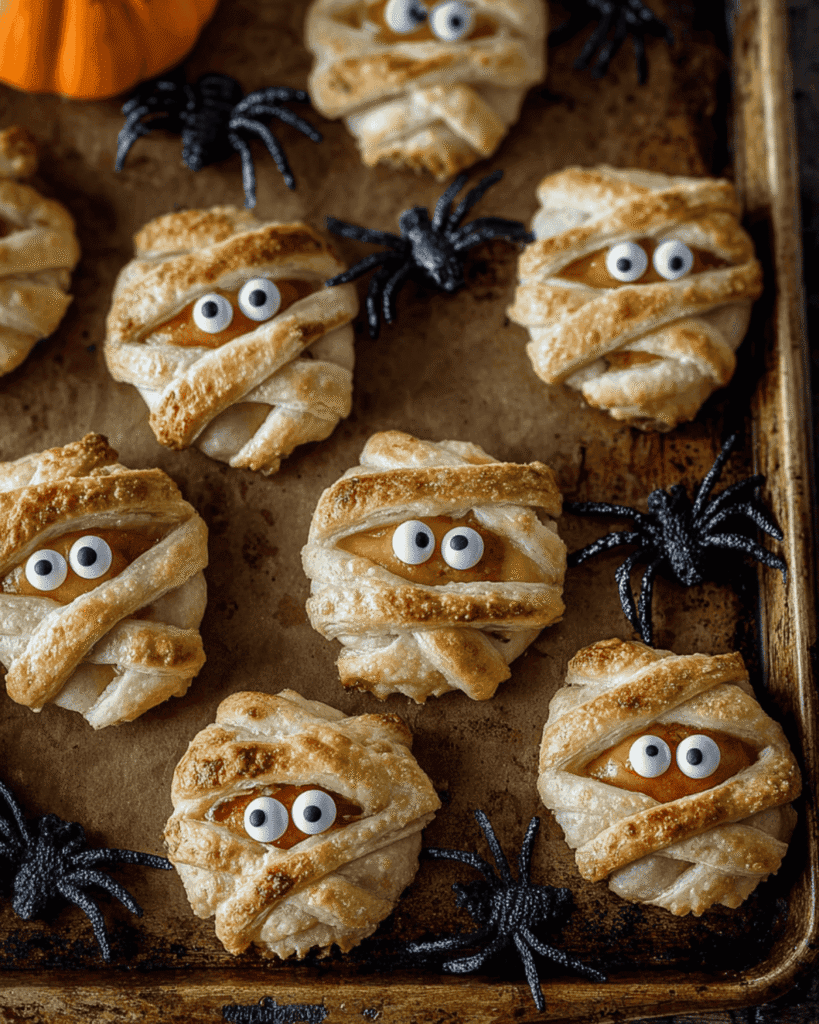
Every holiday season has its own signature flavors and traditions, but when Halloween arrives, creativity in the kitchen truly comes alive. Costumes, spooky decorations, and playful treats fill our homes, and nothing sets the tone for a Halloween gathering quite like themed food. That’s where baked cheese mummies come in. These adorable little bites are inspired by the classic Brie en Croute but transformed into something playful, bite-sized, and perfect for a festive table.
I remember the first time I made these for my kids’ Halloween party. They were instantly captivated by the flaky golden pastry wrapped around melty cheese with little eyes peeking out. What started as a fun experiment quickly became a new holiday tradition in our home. And the best part? These mummies are simple enough for beginners but creative enough to wow your guests. If you’re on the hunt for spooky Halloween snacks that are both delicious and fun, you’ve found your recipe.
Jump To :
What Makes Cheese Mummies So Fun
There’s something magical about food that doubles as decoration, and cheese mummies do just that. Imagine a tray full of golden, flaky pastries, each hiding gooey melted cheese inside. Their little “bandages” of puff pastry crisscross just like a mummy’s wrappings, and once you add edible candy eyes or tiny olive slices, they come to life as scary cheese bites that practically stare back at you.
These aren’t just for kids. Adults love them too, because they blend comfort food with whimsical holiday fun. As part of a larger Halloween spread, they fit right alongside mummy themed snacks, puff pastry appetizers, and other cheesy Halloween treats. When placed next to other festive creations like spooky cheeseburger skulls for Halloween parties, they create a table that’s both inviting and unforgettable.
Plus, they’re bite-sized, making them the perfect Halloween finger foods for mingling and chatting at parties. No mess, no fuss just fun.
Ingredient Spotlight: Why Babybel Cheese Works Best
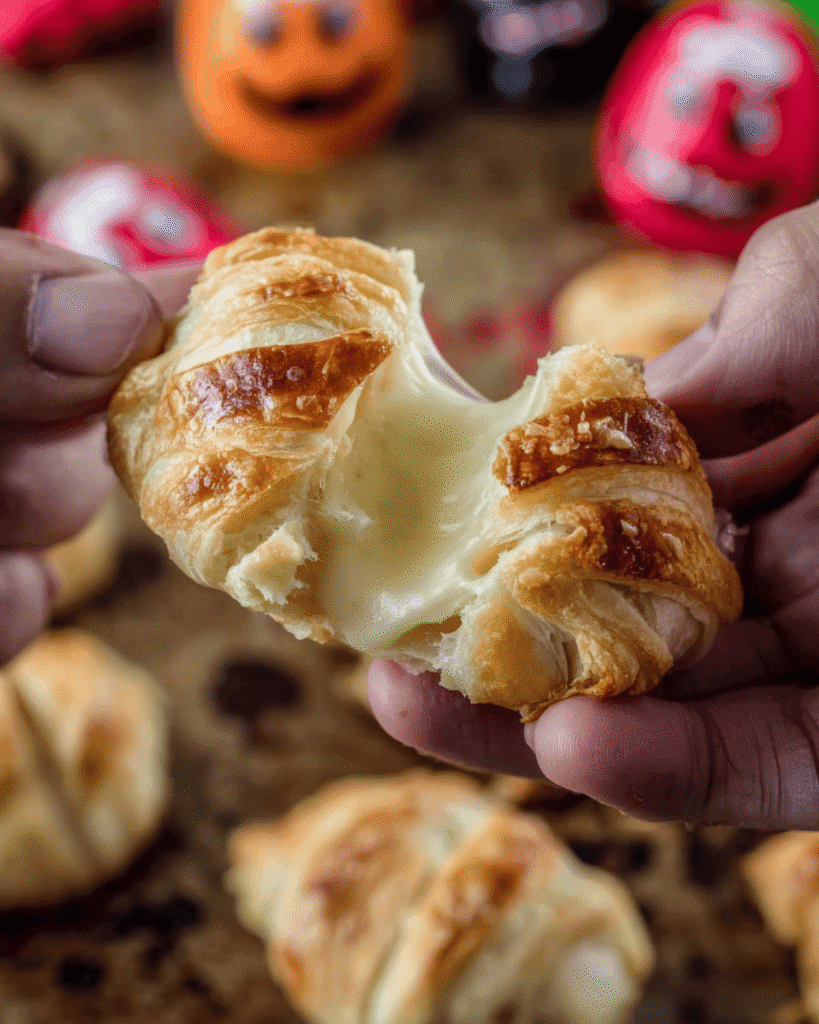
The secret star of these mummies? Mini Babybel cheese. These little wheels of creamy, mild cheese are perfectly portioned for individual snacks. When wrapped in puff pastry, they melt just enough to stay gooey inside while still holding their shape. That’s why they’re ideal for creating mini cheese pastry mummies.
Their size makes them versatile you can bake a large batch quickly without worrying about cutting or measuring. And because they come individually wrapped, they stay fresh until you’re ready to use them.
Of course, you can play around with alternatives too. Brie bites bring a touch of richness, mozzarella balls give a stretchy pull, and cheddar cubes offer sharpness. But for simplicity and consistency, baked Babybel cheese is hard to beat. Pair it with puff pastry wrapped cheese, and you’ve got the foundation for one of the easiest yet most delightful savory Halloween recipes.
Step-by-Step Guide to Baked Cheese Mummies
Making these mummies is just as fun as eating them. Here’s how you can transform a few simple ingredients into bite sized baked cheese mummies that steal the show.
- Prepare the puff pastry: Roll out a sheet of puff pastry on a lightly floured surface. Cut it into thin strips, about half an inch wide. These strips will serve as the “bandages.”
- Wrap the cheese: Take each unwrapped Babybel cheese wheel and carefully wrap strips of puff pastry around it. Overlap the strips in a crisscross pattern to mimic mummy wrappings but leave a small gap for the “face.”
- Add eyes: Place edible candy eyes in the gap or press in two tiny slices of black olives to create spooky eyes peeking out.
- Bake: Preheat your oven to 375°F (190°C). Arrange the mummies on a parchment-lined baking sheet and bake for about 12 to 15 minutes, until the pastry is puffed and golden.
- Cool and serve: Let them cool for a couple of minutes before serving. The cheese inside will be hot and melty.
These can be made in advance and stored in the fridge before baking, making them excellent quick Halloween appetizers. Pop them in the oven just before your guests arrive, and you’ll have fresh, warm mummies ready to impress. Pair them with Halloween witch’s potion punch for themed drinks for a perfectly spooky pairing.
Personal Anecdote
Last year, I tested these on my own kids before a big Halloween party. I wasn’t sure how they’d react, but the moment I placed the tray on the table, they squealed with delight. My youngest even gave one of the fun Halloween food for kids creations a name “Mr. Cheesy.” Needless to say, the platter was empty within minutes.
Moments like that are what make cooking so enjoyable for me. These little mummies turned into more than just baked cheese bites; they became part of our holiday tradition. And I can say with confidence: they’ll become part of yours too.
Serving Ideas and Variations
The beauty of cheesy Halloween bites is their versatility. You can serve them in countless ways, depending on the mood of your party. For example:
- Pair them with marinara or pizza sauce for a “bloody” dipping effect.
- Offer ranch or garlic aioli for those who love creamy dips.
- Create a platter with a mix of cheese and pastry treats, fruit, and crackers for balance.
If you’re hosting a larger gathering, add variety by filling some puff pastry mummies with different cheeses or even a small cube of beef sausage. They become savory mummy snacks that surprise guests with every bite.
Round out your table with hearty dishes like pumpkin chili served in edible bowls for fall gatherings. And for dessert, you can’t go wrong with sweet vampire cupcakes for spooky dessert tables. A complete menu of savory and sweet Halloween themed recipes makes for a party no one will forget.
Tips for Hosting a Halloween Party
Planning a holiday party is all about balance. You want treats that look amazing but don’t take hours of work. That’s why recipes like these mummies shine. They’re easy baked appetizers that look like they belong in a professional bakery.
Pair them with a mix of sweet and savory dishes to keep your guests satisfied. Drinks are equally important. Consider serving Halloween party drinks for kids alongside adult beverages so everyone feels included. And don’t forget the decorations dim lighting, carved pumpkins, and spooky music complete the experience.
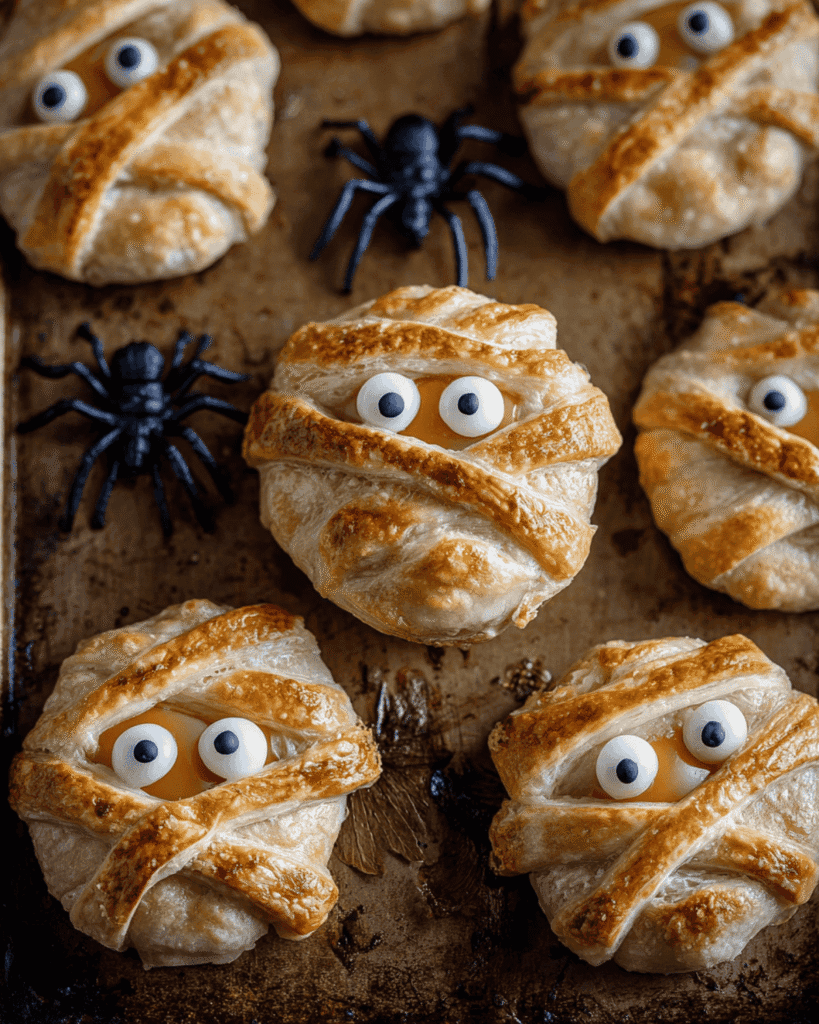
Encourage your guests to get involved too. Set up a little “food craft” station where kids can assemble their own edible Halloween crafts, from decorating cupcakes to placing eyes on their mummies. Interactive food is a guaranteed hit.
FAQs About Baked Cheese Mummies
Yes. You can assemble the mummies, cover them tightly, and store them in the fridge for up to 24 hours before baking. Bake them just before serving for the best results.
Brie bites, mozzarella balls, and cheddar cubes are all great options. Just make sure they’re firm enough to hold their shape while baking.
Serve the mummies fresh from the oven and avoid covering them while they cool, as steam can soften the pastry. If needed, you can reheat them briefly in the oven.
Yes, though they’re best eaten warm. If packing for school, wrap them in foil and include a small dipping sauce for extra fun.
Baked Cheese Mummies
- Total Time: 30 minutes
- Yield: 12 mummies 1x
Description
These baked cheese mummies are the perfect spooky Halloween snack flaky puff pastry wrapped around gooey Babybel cheese with fun little eyes peeking out. They’re simple to make, kid-friendly, and guaranteed to wow your Halloween guests.
Ingredients
- 1 sheet puff pastry, thawed
- 12 Mini Babybel cheeses (unwrapped)
- 24 candy eyes or small olive slices
- Flour (for dusting)
Instructions
- Preheat oven to 375°F (190°C) and line a baking sheet with parchment paper.
- On a lightly floured surface, roll out puff pastry and cut into thin strips (about 1/2 inch wide).
- Wrap strips of puff pastry around each Babybel cheese wheel in a crisscross pattern, leaving a small gap for the “face.”
- Place candy eyes or olive slices in the gap to create mummy eyes.
- Arrange wrapped cheeses on the baking sheet.
- Bake for 12–15 minutes, or until puff pastry is golden and crispy.
- Cool for 2–3 minutes before serving—cheese will be hot inside.
Notes
These can be assembled a day ahead and stored in the fridge before baking. For dipping, serve with marinara sauce for a spooky “bloody” effect.
- Prep Time: 15 minutes
- Cook Time: 15 minutes
- Category: Holiday
- Method: Baked
- Cuisine: Halloween
Nutrition
- Serving Size: 1 mummy
- Calories: 120
- Sugar: 0g
- Sodium: 210mg
- Fat: 8g
- Saturated Fat: 4g
- Unsaturated Fat: 3g
- Trans Fat: 0g
- Carbohydrates: 7g
- Fiber: 0g
- Protein: 5g
- Cholesterol: 15mg
Conclusion
Halloween is the perfect excuse to play with your food, and these baked cheese mummies prove it. With minimal effort and maximum creativity, you can whip up a tray of spooky pastry recipes that bring joy to everyone around the table. Whether you’re a seasoned cook or just dipping your toes into festive baking, this recipe is approachable, rewarding, and undeniably fun.
Whether you’re a busy parent, a student grabbing holiday snacks on the go, or anyone hungry for something wholesome and delicious, this recipe fits the bill. Don’t forget to leave a comment or tag us with your cooking success! Follow Daily Tasty Recipe on Pinterest and instagram for more inspiration.