
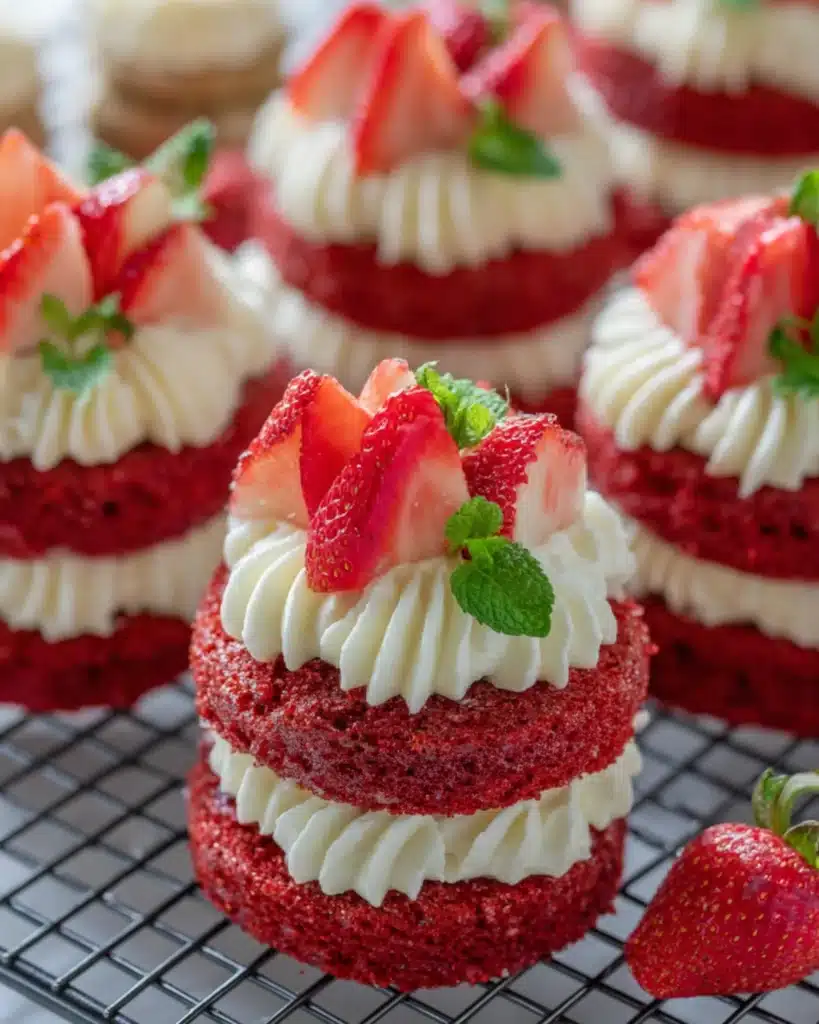
A Delightful Snack-Sized Treat with Classic Red Velvet Flavor
Mini Red Velvet Cakes are the perfect way to enjoy the timeless taste of red velvet in a bite-sized, snackable form. These moist, fluffy cakes carry the signature tang of buttermilk and cocoa, topped with smooth cream cheese icing. Because they’re smaller and quicker to bake, they make a great treat for busy days, gatherings, or holiday celebrations. Whether you’re new to baking or an experienced home cook, this guide will walk you through every step of creating these soft, flavorful, and elegant little desserts.
Jump To :
Why You’ll Love These Mini Red Velvet Cakes
Mini Red Velvet Cakes aren’t just visually stunning; they’re also incredibly delicious. The combination of cocoa, tangy buttermilk, and creamy frosting delivers that classic red velvet flavour everyone loves. In addition, their small size means they bake faster and are perfect for portion control. Because they’re elegant yet simple, these mini cake desserts are ideal for serving at parties or gifting to loved ones. Furthermore, their soft crumb and vibrant red color make them a delightful choice for any occasion.
Ingredients for Mini Red Velvet Cakes
Before starting, gather everything you need to make sure the process goes smoothly. Having ingredients ready will make your baking experience effortless and enjoyable.
- 1 and 1/4 cups all-purpose flour
- 1 tablespoon unsweetened cocoa powder
- 1/2 teaspoon baking soda
- 1/4 teaspoon salt
- 3/4 cup granulated sugar
- 1/2 cup vegetable oil
- 1 large egg
- 1/2 cup buttermilk
- 1 teaspoon white vinegar
- 1 teaspoon alcohol-free vanilla extract
- 1 tablespoon red food coloring
These ingredients work together to create a moist red velvet texture that’s rich yet light. The combination of vinegar and buttermilk enhances the color and tenderness, making every bite soft and velvety.
This post may contain affiliate links. As an Amazon Associate, Daily Tasty Recipe earns from qualifying purchases at no extra cost to you.
Tools Needed
This post may contain affiliate links. As an Amazon Associate, Daily Tasty Recipe earns from qualifying purchases at no extra cost to you.
To ensure your mini cakes turn out perfect, it’s essential to have the right equipment on hand. Having the proper tools not only simplifies the process but also ensures professional results every time.
- Mini muffin pan or 4-inch mini cake molds
- Electric hand mixer or stand mixer
- Rubber spatula
- Mixing bowls
- Cooling rack
- Piping bag and tip for frosting
Because precise baking is all about consistency, these tools will help maintain even texture and perfect shapes. Furthermore, silicone molds make it easier to release the cakes without breaking them.
Step-by-Step Instructions for Mini Red Velvet Cakes
Step 1: Prepare Your Oven and Pans
Preheat your oven to 350°F (175°C). Lightly grease your mini muffin pan or line it with paper cups. Preheating helps the cakes rise evenly from the start, ensuring they stay fluffy and soft.
Step 2: Combine the Dry Ingredients
In a medium bowl, whisk together the flour, cocoa powder, baking soda, and salt. Mixing the dry ingredients first prevents clumps and helps distribute the cocoa evenly throughout the batter. Therefore, every bite will have a balanced flavor and texture.
Step 3: Mix the Wet Ingredients
In a separate large bowl, beat together the sugar and oil until smooth. Then, add the egg and whisk until fully combined. After that, pour in the buttermilk, vinegar, alcohol-free vanilla extract, and red food coloring. Because these wet ingredients add moisture and flavor, they form the base of your red velvet batter recipe.
Step 4: Combine and Stir Gently
Gradually add the dry mixture into the wet ingredients. Stir just until combined, avoiding overmixing. Overmixing can make the cakes dense, so gentle folding is key. The batter should be smooth and slightly thick, with a rich red color that’s uniform throughout.
Step 5: Fill and Bake
Using a spoon or piping bag, fill each mold two-thirds full. Bake for 12–15 minutes or until a toothpick inserted into the center comes out clean. Because mini cakes bake faster than traditional ones, keeping an eye on the timer ensures they stay moist and tender.
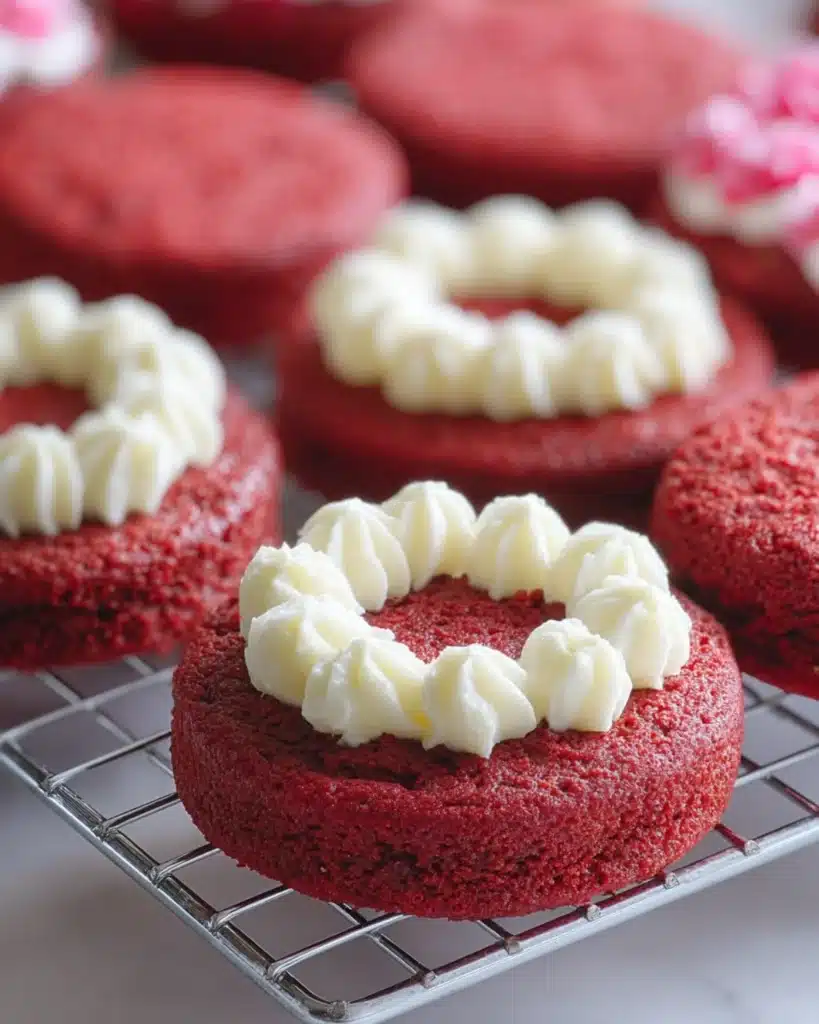
Step 6: Cool and Frost
Allow the cakes to cool for 10 minutes in the pan, then transfer them to a cooling rack. Once completely cool, frost with cream cheese icing for the perfect creamy finish. For extra elegance, top with a dusting of cocoa or edible pearls.
Tips for Perfect Mini Red Velvet Cakes
Perfecting these little cakes requires just a few easy tricks. Firstly, always use room-temperature ingredients for smoother blending. Secondly, don’t skip the vinegar and buttermilk they create that signature tender crumb. Moreover, allow the cakes to cool before frosting, so your icing doesn’t melt. If you want a twist, try different red velvet frosting variations, such as whipped buttercream or mascarpone frosting. For festive gatherings, decorate them as holiday mini red velvet treats with sprinkles or colored sugar. Finally, for inspiration on another festive treat, check out Orange Velvet Cake dessert inspiration on Daily Tasty Recipe.
Serving and Storage
Once your tiny red velvet confections are frosted, serve them immediately or refrigerate for up to three days in an airtight container. Because they stay fresh and moist, they’re ideal for preparing ahead for parties or as quick weekday snacks. If you love themed desserts, explore the Vampire Bite Halloween Cupcakes with red velvet base for more creative red velvet ideas. To discover even more indulgent cakes, you can also explore Other cake dessert ideas from Daily Tasty Recipe.
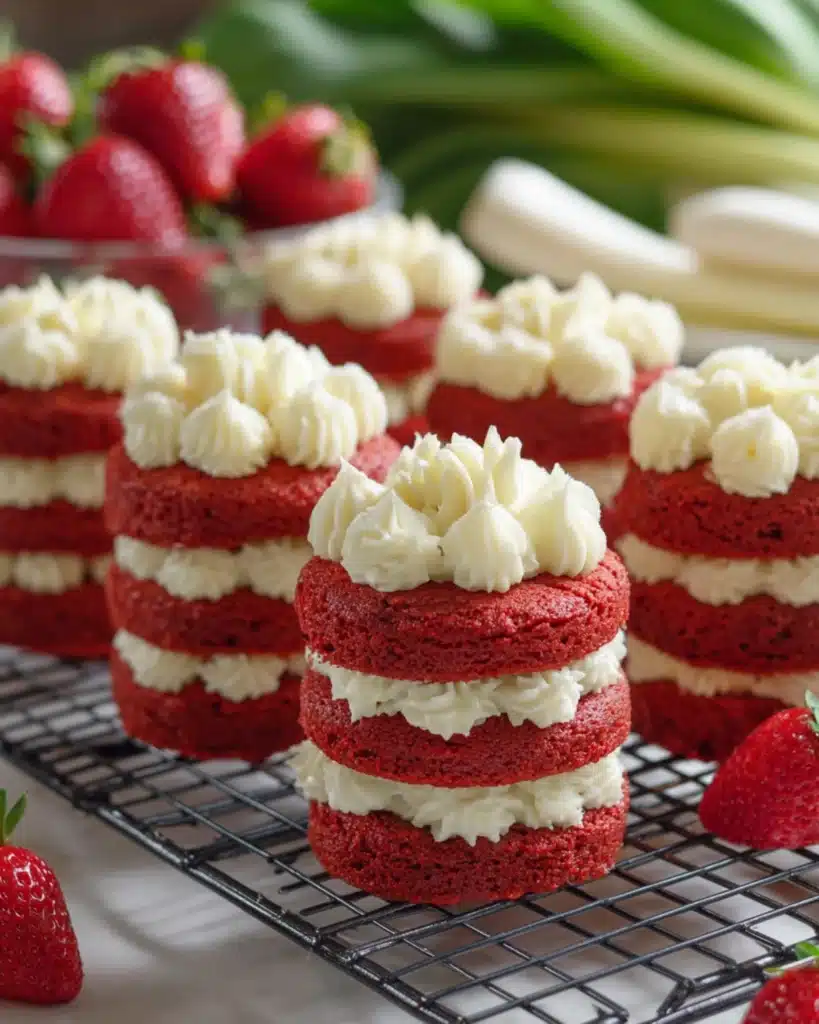
Valentine’s Day Inspiration for Mini Red Velvet Cakes
A Romantic Dessert for Your Loved One
Valentine’s Day is the perfect occasion to bake these adorable Mini Red Velvet Cakes. Their rich red hue symbolizes love and affection, making them an ideal treat to surprise your special someone. Because of their soft texture and creamy topping, they pair wonderfully with strawberries, raspberries, or a drizzle of white chocolate. You can even shape them into hearts using mini molds for a romantic twist. Sharing these cakes is more than just dessert; it’s a gesture of love wrapped in sweetness.
Perfect Presentation and Gifting Ideas
You can package these cakes in small gift boxes tied with ribbons or serve them on a candle-lit table for an intimate celebration. The delicate flavor of red velvet perfectly complements the warmth of Valentine’s festivities. Whether baked for your partner, family, or friends, these mini cakes are sure to make the day feel extra special and memorable.
FAQs About Mini Red Velvet Cakes
Each mini cake contains about 120–150 calories, depending on the size and amount of frosting used. They’re indulgent but portion-friendly, perfect for mindful eating.
Red velvet cakes can be made lighter by using vegetable oil instead of butter and reducing sugar. Because they’re smaller, these minis make a balanced and satisfying dessert option.
The secret lies in the balance of cocoa, buttermilk, and vinegar, which creates that tender, moist red velvet crumb and a subtle tangy flavor.
Quality ingredients like cocoa, buttermilk, and cream cheese add to the cost, but the flavor and texture are worth it. Homemade versions, however, are budget-friendly and easy to make.
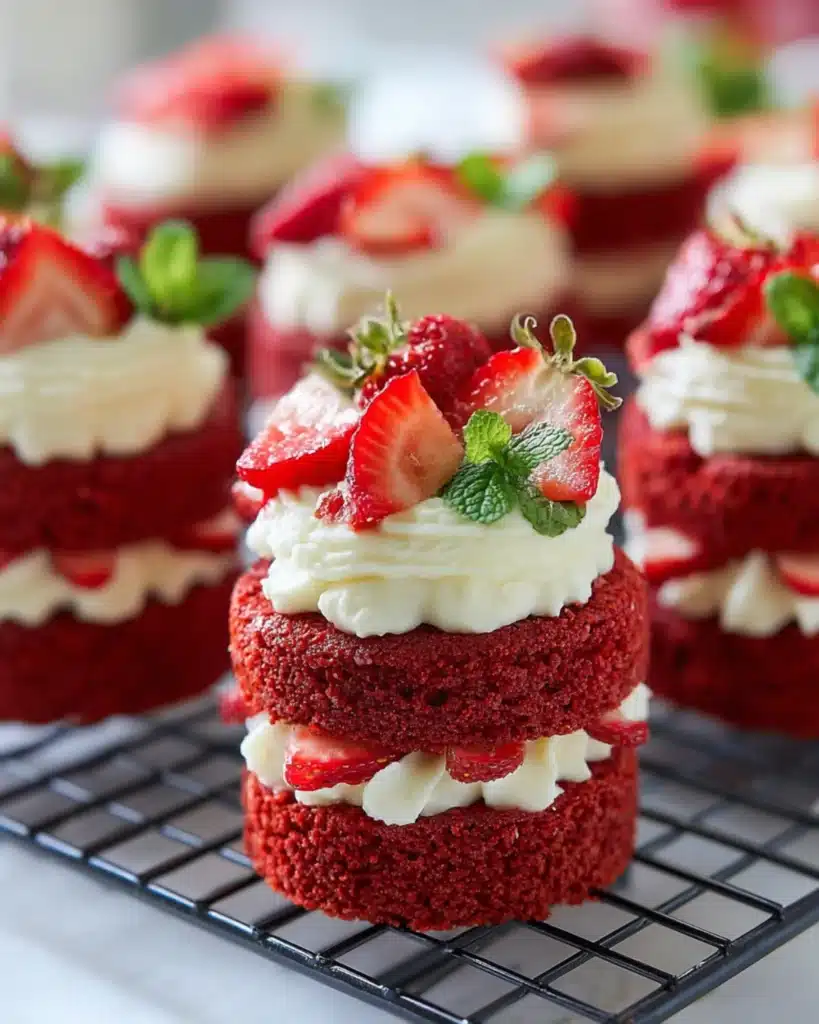
Conclusion
Baking Mini Red Velvet Cakes is not only enjoyable but also rewarding. Because they’re easy to prepare, perfectly portioned, and irresistibly soft, they make a wonderful addition to any snack table. Try them once, and you’ll understand why they’re a favorite for holidays and everyday treats alike.
Whether you’re a busy parent, a student grabbing snacks on the go, or anyone hungry for something wholesome and delicious, this recipe fits the bill. Don’t forget to leave a comment or tag us with your baking success! Follow Daily Tasty Recipe on Pinterest and Instagram for more inspiration.

Mini Red Velvet Cakes
- Total Time: 35 minutes
- Yield: 24 mini cakes 1x
Description
These Mini Red Velvet Cakes bring all the rich, classic flavor of red velvet into perfectly portioned, bite-sized desserts. Soft, moist, and topped with smooth cream cheese icing, they’re ideal for Valentine’s Day, parties, or any time you crave a sweet indulgence.
Ingredients
- 1 and 1/4 cups all-purpose flour
- 1 tablespoon unsweetened cocoa powder
- 1/2 teaspoon baking soda
- 1/4 teaspoon salt
- 3/4 cup granulated sugar
- 1/2 cup vegetable oil
- 1 large egg
- 1/2 cup buttermilk
- 1 teaspoon white vinegar
- 1 teaspoon alcohol-free vanilla extract
- 1 tablespoon red food coloring
Instructions
- Preheat oven to 350°F (175°C) and lightly grease your mini muffin pan or line it with paper cups.
- In a medium bowl, whisk together flour, cocoa powder, baking soda, and salt.
- In a separate large bowl, beat together sugar and oil until smooth, then add egg and mix until combined.
- Pour in buttermilk, vinegar, alcohol-free vanilla extract, and red food coloring; whisk until smooth.
- Gradually fold the dry ingredients into the wet mixture until just combined. Avoid overmixing.
- Fill each mold two-thirds full and bake for 12–15 minutes or until a toothpick inserted comes out clean.
- Let the mini cakes cool for 10 minutes, then transfer to a cooling rack.
- Once cooled, frost with cream cheese icing and decorate as desired.
Notes
For best results, use room-temperature ingredients and don’t overmix the batter. Allow cakes to cool before frosting to keep the icing firm. Store in an airtight container for up to three days or refrigerate for longer freshness.
- Prep Time: 20 minutes
- Cook Time: 15 minutes
- Category: Dessert
- Method: Baked
- Cuisine: American
Nutrition
- Serving Size: 1 mini cake
- Calories: 140
- Sugar: 12g
- Sodium: 120mg
- Fat: 7g
- Saturated Fat: 1.5g
- Unsaturated Fat: 5g
- Trans Fat: 0g
- Carbohydrates: 16g
- Fiber: 0.5g
- Protein: 2g
- Cholesterol: 15mg